Irashaimase~!! ( いらしゃいませ~!! )
Today, I'll be teaching you on how to ink in your drawings using Photoshop 3nodding (Or some of you might want to call it 'tracing' sweatdrop ) . By inking your images, you can get it prepared to be colored or otherwise known as CG
((CG Tutorial coming soon))
Anyways, there are 2 ways to ink your drawings in Photoshop.
These 2 ways are not always the correct way, there might be another technique which is better, okay? O-gay?! Alright ~!! FTW~
Alright then... Oh ! You might want to Save this page if you're always facing net connection problems. To save this page into your hard-disk, click File then look for Save Page As option and save it.
Well then, lets get started shall we?
Technique Number 1
Firstly open a picture you want to ink into your Photoshop.
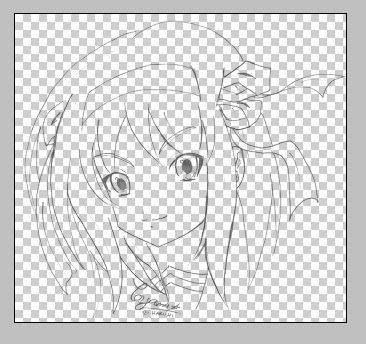
I'll be using this Haruhi picture I drew on a piece of what used to be an A2 size drawing paper.
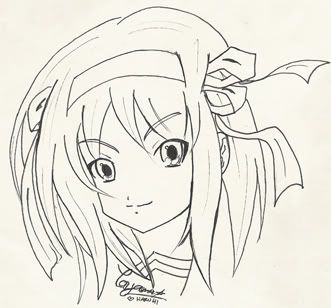
Hrm... doesn't look really 'clean' (White) isn't it? =/
Well no problem, firstly duplicate the layer of this image, Hold & Drag the layer of this image into
Then discard the layer with the
After that, click the option channels which can be found on the same Layer window. (If you can't find the channels window, click Window then click Channels in your Photoshop )
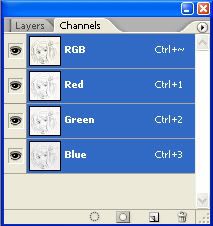
After that click on this icon, making sure all RGB, Red, Green and Blue layers are selected, click
Go back into your layers window and hit the Delete or Backspace on your keyboard.
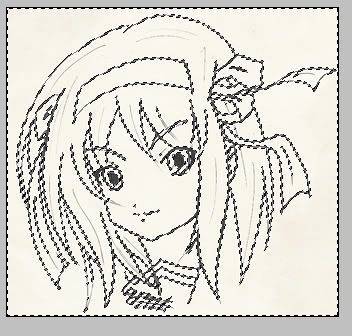
After that, press CTRL and D to de-select. This will happen when you did it correctly, after that click
I'm going to name the new layer BG and the transparent image layer Image
After that
 the BG layer with white. There~! The picture looks much cleaner, isn't it?
Stop there if you want to CG the image !
Now Hold CTRL and press E to bring the Transparent image layer into your the BG layer to form a clean black & white picture.
Wait, the tutorial doesn't stop there, if you want to make the lines darker...
Hold CTRL and hit the L button on your keyboard to bring out the Level window
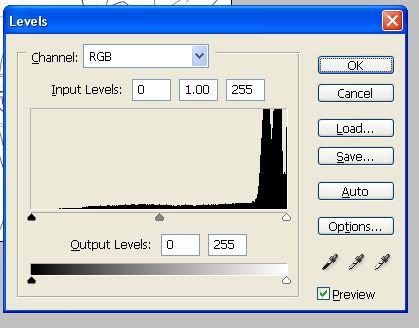
Play around with the Gray colored dial until you get the darkness of the lines you want.
NOTE : By playing with the dial, you may notice that all the 'dirt' of the picture returning. Just repeat the process above to get a cleaner version layer of the darker lined artwork.
Technique Number 2
Firstly open the image on Photoshop.
As above, I'll be using the same picture.
Repeat the above steps above of duplicating the layer.
Myself
Firstly duplicate the layer of this image, Hold & Drag the layer of this image into  in order to duplicate it. (You can create new blank layers with this icon too)
Then discard the layer with the into the
after that click to create a new layer and move the new layer below the image.
After that the BG layer with white
Then discard the layer with the
after that click
After that
the BG layer with whiteAfter that, click
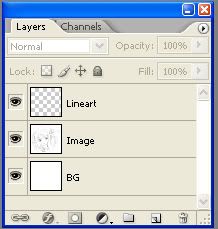
I'm going to name the layer with the image Image, the layer painted in white as BG and the new transparent layer above the image as Lineart.
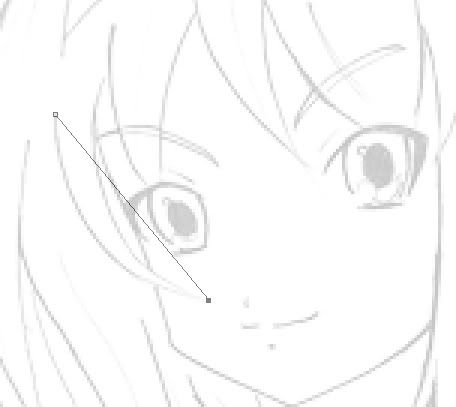
Now right click on the Image layer and click on Blending Options, change the Opacity of this image to around 30% - 50%, depending on which opacity you think it's suitable so that it does not clash with the Inking work.
Now click on the Lineart layer, as to select it.
Click on the
 .
. Make sure it's to this settings :

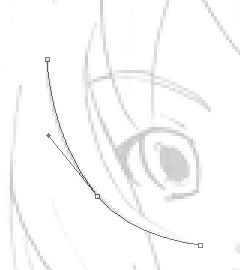
Click on the part of the image you want to start the line and click on where-ever you want it to end, example :
Then click on the
After that Right click and select Add Anchor Point and start pulling/playing around with the new anchor point, you can adjust the two lines produced by that anchor point too.
After that, select the
 , adjust the Brush stroke/Opacity/Flow to your liking, and go back to the
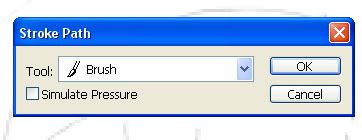
Click OK and a line will be formed, right click using the
Now, remember the Stroke Path Window above? If you click the option
Stimulate Pressure, your lines will have weight in them depending on the size of the brush you use.
Okay, example : After you have stroke your first path, go back to your
tool and change the brush stroke to 3. After that, go back to This are the samples I made using/not using that option :
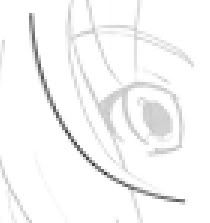
Brush Stroke : 1 . With No Simulate Pressure
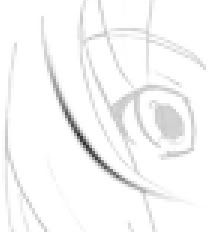
Brush Stroke : 3 . Using Simulate Pressure only
Brush Stroke : 1 No Pressure + Brush Stroke : 3 With Pressure
Finish off the whole image depending on which of the option you like and click on the
Suzumiya Haruhi (涼宮ハルヒ) is © Tanigawa Nagaru (谷川 流) & Itō Noiji (いとうのいぢ)
Tanigawa was the author and Ito was the illustrator to Suzumiya Haruhi series.
All artworks here was drawn by me ! Haha~
Don't forget to visit my DeviantArt !! Toyama @ DeviantArt